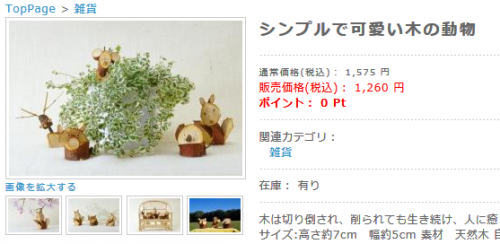
サムネイル画像は、サブ情報に画像が登録されて初めて表示される。サムネイル画像は、サブ情報に登録される画像と同じ。
サムネイル画像にカーソルを乗せると上のメイン画像が入れ替わり、クリックすると拡大画像(サブ情報に登録された拡大画像)が表示される。
(1)■data/Smarty/templates/default/products/detail.tpl
① ★画像★の、imgタグに、name=”remote_image” id=”remote_image” 追加
<img src="<!--{$arrFile[$key].filepath|h}-->" width="<!--{$arrFile[$key].width}-->" height="<!--{$arrFile[$key].height}-->" alt="<!--{$arrProduct.name|h}-->" class="picture" name="remote_image" id="remote_image" />
② の下に追加
の後に。
<!--{assign var=key value="sub_title`$smarty.section.cnt.index+1`"}-->
<!--{assign var=ikey value="sub_image`$smarty.section.cnt.index+1`"}-->
<!--{if $arrProduct[$key] != "" or $arrProduct[$ikey]|strlen >= 1}-->
<!--▼ロールオーバー画像▼-->
<!--{assign var=x value=$arrFile.main_image.width}-->
<div id="over_image_box" style="width:<!--{math equation="$x+10"}-->px;">
<!--{section name=cnt loop=$smarty.const.PRODUCTSUB_MAX}-->
<!--{assign var=key value="sub_image`$smarty.section.cnt.index+1`"}-->
<!--{assign var=keyl value="sub_large_image`$smarty.section.cnt.index+1`"}-->
<!--{assign var=keyt value="sub_title`$smarty.section.cnt.index+1`"}-->
<!--{assign var=keym value="main_image"}-->
<!--{assign var=x value=$arrFile.main_image.width}-->
<!--{assign var=y value=$arrFile.main_image.height}-->
<!--{if $arrProduct[$key] != ""}-->
<div class="over_image">
<a class="cbox" href="<!--{if $arrProduct[$keyl]|strlen >= 1}--><!--{$smarty.const.IMAGE_SAVE_URLPATH}--><!--{$arrProduct[$keyl]|h}--><!--{else}--><!--{$smarty.const.IMAGE_SAVE_URLPATH}--><!--{$arrProduct[$key]|h}--><!--{/if}-->" title="<!--{$arrProduct[$keyt]|h}-->" onmouseover="chgImg('<!--{$smarty.const.IMAGE_SAVE_URLPATH}--><!--{$arrProduct[$key]|h}-->','remote_image');" onmouseout="chgImg('<!--{$smarty.const.IMAGE_SAVE_URLPATH}--><!--{$arrProduct[$keym]|h}-->','remote_image');">
<img src="<!--{$smarty.const.ROOT_URLPATH}-->resize_image.php?image=<!--{$arrProduct[$key]|sfNoImageMainList|h}-->&width=<!--{math equation="$x*0.22"}-->&height=<!--{math equation="$y*0.22"}-->" /></a>
</div>
<!--{/if}-->
<!--{if $smarty.section.cnt.iteration % 4 === 0}-->
<div class="clear"></div>
<!--{/if}-->
<!--{/section}-->
</div>
<!--{/if}-->
(2)■html/user_data/packages/default/css/contents.cssに追加
/* ロールオーバー画像 */
#detailphotobloc .photo img { /*メイン画像の縁取り(8px増加)*/
padding:3px;
border:#CCC 1px solid;
}
#detailphotobloc .over_image {
float:left;
width:25%;
margin-bottom:20px;
}
#detailphotobloc .over_image img {
padding:2px;
border:#CCC 1px solid;
}
(3)メイン画像の幅が260pxに対して、サブ画像の幅は200pxになっているため、画像が入れ替わる際、サブ画像はもとのサイズより拡大されて表示されるので画質が落ちる。
拡大サブ画像をリサイズする方法もあるが、このページではすでにリサイズ画像が多いので、あまり多用すると表示が重くなる。また、必ずしも管理者が拡大画像を登録するとは限らない。
そこで、メイン画像とサブ画像を同じサイズにする。
① システム設定>パラメーター設定で値を変更する。
NORMAL_SUBIMAGE_WIDTH:260(通常サブ画像横)
NORMAL_SUBIMAGE_HEIGHT:260(通常サブ画像縦)
② サブ画像が既に登録されている場合は、もう一度画像のみ登録し直す。
(4)CSSで、メイン画像に縁取りしたので、画像サイズ(260px)より8px大きく表示される。
このサイトのYouTube動画カスタマイズを行っている場合は、パラメータ設定によりYouTubeのサイズを変更する。
YouTube動画の横幅:260px → 268px
↓
YouTube動画の縦幅:195px → 201px
(5)メイン画像の大きさ設定を変更すると、サムネイル画像の大きさはそれに合わせて自動的に変更される。

